

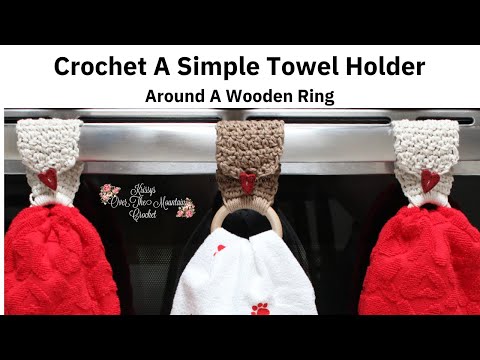
Let me show how to crochet a simple towel holder. Crochet around a wooden ring then continue to crochet a tab with a button hole. Put a towel in the ring. After that wrap the tab around your oven or fridge handle, button it down and you have a handy place to hang your towel.
The free crochet pattern is below, or you can purchase the ad free pdf at RAVELRY or ETSY.


Crocheting Towel Holders is something that I enjoy designing.
I have designed a few towel topper that are unique. The latest is a Floating Heart Towel Topper. It uses the wooden Ring technique.


There are other unique towel holders designed that don’t involve a wooden ring.
My favorite towel holders are the Floating Bunny Stitch and the Floating Shamrock Stitch. They are made in a bell shape that is decorated with floating crochet stitches & spike stitches. The Floating Shamrock Stitch is an original stitch.


Simple Towel Holder Crochet Pattern
Yarn used:
This design falls into the “Scraps” category, but to be safe, here’s an over estimation/approximate yarn amount. MC=100-120 yds
I used acrylic and cotton worsted weight (4) yarn.
Gauge:
Finished measurements, gauge isn’t all that important, as long as the length is long enough to wrap around the oven, fridge or cabinet door handle. Finished measurement- approx. 6”
Here is a video tutorial on how to crochet this simple towel holder.
Crochet Hook:
H-8/5.00 mm
Supplies:
1. Any wooden or plastic ring of your choosing. I used a 3” & 2” ring. The smaller ring can easily hold a tea towel that isn’t fluffy. If you are using a fluffy towel, I recommend the larger ring.
2. Clear buttons, or plain buttons in the size of your choosing. There are cute kitchsy buttons that would dress these towel toppers up a bit.
Sewing needle and thread to sew on the buttons and the optional bows.
Stitch Guide:
join w/ = join with
slp st = Slip Stitch
ch = Chain
sc = single Crochet
hdc = half double crochet
dc = double crochet
sp = Space
nxt = Next
st = Stitch
* * = Execute sequence between the stars, the number of times stated
x = Times; example Repeat 2 x or 2 times; 3 x or 3 times and so on.
Designer Notes:
1.Beginning chains do not count as a stitch.
Here is a youtube video tutorial that will show you how to sc around the ring
Even though the free crochet pattern is below, or you can purchase the ad free pdf at RAVELRY or ETSY.
**********************************
Hold the ring and your working yarn, in the opposite hand you hold your hook. Example, if you crochet right handed, hold the hook in your left hand and vice versa.
With the slp st on the hook, bring the hook close to the ring. Hold the yarn above the ring. Put the hook through the ring, yarn over, pull up a loop above the ring; yarn over and pull through both loops on the hook. Make sure that the top two loops is above the ring. You have just completed a 1 sc around the ring.
Row 1: with a slp st on your hook, sc around the wooden ring 9x; ch1 & turn (9sc)
Row 2: Hdc in each st, ch1 & turn (9hdc)
Row 3: sc in nxt st;* dc in nxt st; sc in nxt st;* 8x; ch1 & turn (9 st’s) NOTE: This will be the right side of your work.
Row 4: sc in each st across; ch1 & turn (9sc)
Row 5 – 14: Repeat Rows 3&4 consecutively (9 st’s) If you would like more length to the tab, repeat Row 3&4 until you are satisfied.
Row 15: sc in nxt st;* dc in nxt st; sc in nxt st;* 8x; ch1 & turn (9 st’s)
Row 16: sc in nxt st;* dc in nxt st; sc in nxt st;* 8x; ch1 & turn (9 st’s)
Row 17: sc2tog; sc in nxt 2 sts; ch1, skp st,(button hole made) sc in nxt 2 st’s, sc2tog; end off weave in all ends. Approx. 6”
Sew a button at the center of Row 2. Test to make sure the button will go through the button hole before weaving in the ends. It is too large, rework Row 17 and ch2 instead of ch1. Optional:Place a cute little pull tie bow at the base of the heart. Glue it or sew into place.
Here is a youtube tutorial on how to sew a shank on to a flat backed button. This is an easy technique.
The next towel topper that I am going to design, will have a floating shamrock stitch. Stay tuned.
Here is a photo that you can pin to your favorite crochet boards.


- Make sure to visit these links if you are looking for beautiful crochet patterns that will inspire you to make your world a lovely place. If you would like to see more crochet baskets or garments click the links below.YOUTUBERAVELRY
PINTEREST is a fun place and I would love it if you would follow me there.
COPYRIGHT STATEMENT
This pattern is protected by copyright© Krissys Over The Mountain Crochet 2024. Do not sell, alter or redistribute this pattern in any way or form. You have my permission to sell your finished product, but you are responsible for the finished product. No Mass Production.