

Crochet a Lemon Farmhouse Placemat to decorate your Farmhouse home this summer. The Lemon placematis the perfect companion to the Lemon Farmhouse Mug Rug,Coaster and the kitchen towel topper! I hope you enjoy this crochet pattern. You will find the free version if you keep scrolling. This placemat crochet pattern was part of the 2nd Launch of the “Summer Celebration At Krissy’s.
I sometimes use affiliate links in my posts. This won’t cost you anything, but will help offset the cost of yarn and other supplies needed, that I can continue bringing you crochet patterns and craft ideas. Thank you so much for your support.

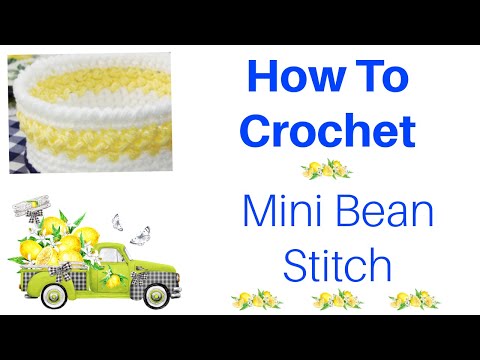
The Mini Bean Stitch is beautiful on this placemat.
It is an easy stitch that has so much texture. It reminds me of piles of lemons. The right and left tilt is one of the things I adore about this stitch, and it is the highlight stitch of the Lemon Farmhouse Placemat. The fringe adds the finishing touch, just as it does on the Lemon Farmhouse Mug Rugs. Yes…there are two mug rugs. Let me know in the comments if you will be making the placemat, or any of the other items in the Lemon Farmhouse Kitchen and Table Decor series crochet patterns.
Lemon Farmhouse Placemat Information
Yarn Used:
Red Heart Super Saver; MC= White; CC1 Yellow; CC2 = Navy
MC = White 100 yds; CC1 = Yellow – 60 yds; CC2 = Navy – 2yds; I highly recommend cotton yarn, please pay careful attention to the Notes on the yarn used below.
Notes on Yarn Used:
If using a lightweight cotton such as Hobby Lobby’s “I Love This Cotton” it will make a smaller product. I recommend adding 4-6 chains to the base chain on the mug rug and placemat. I also recommend adding 2 to 4 rows at Rows 13-26 of the placemat.
Gauge:
4″x4″ = 14 st’s across x 13.5 rows high
Swatch
chain 26,
Row 1: sc in 2nd ch from hook and in each ch across, ch 1 & turn (25 st)
Row 2: sc in 1st st, *dc in nxt st, sc in nxt st* repeat across; ch 1 & turn (25 st)
Row 3- 18: Repeat row 1 & 2
Hook
H-8/5.00 mm
Stitch Guide:
MC = Main Color = White
CC1 = Contrasting Color = Yellow
CC2 = Contrasting Color = Navy
ch = Chain
sc = Single Crochet
join w/ = join with
slp st = Slip Stitch
skp = Skip
sp. = Space
nxt = Next
prev. = previous
st./st’s = stitch or stitches
beg. = beginning
* * = Complete sequence between the stars, the number of times stated;
x = Times; example Repeat 2 x or 2 times; 3 x or 3 times and so on;
in = example “in nxt st” means you will be inserting the hook under the top two loops of the next stitch to complete stitch or sequence of stitches stated
yo = Yarn Over
Special Stitch Guide:
mb = Mini Bean Stitch = insert hook into the stitch indicated, draw up a loop, yo, insert hook into the same st, draw up a loop, yo, draw thru all 4 loops on hook, ch 1 to close the stitch.
The mb stitch is a unique cluster stitch. When the pattern is worked in rows each row of stitches has a right and left tilt. It is easy to use the ch 1 space to execute the cluster, but it will not give you the right, left tilt. The Pic below is showing where to insert your hook, for the next row of clusters.
Lemon Farmhouse Placemat


Using H hook & holding one strand of MC, ch 44
Row 1:
sc in 2nd ch from hook and in each ch across; ch 1 & Turn (43 st’s)
Row 2 & 3:
sc in 1st st, and in each st across; ch 1 & Turn; At the end of Row 3, drop MC & pull up CC1 at the ch 1. Cut MC leaving approx. a 6″ tail to weave in later, or to use as fringe.(43 st’s)
Row 4:
mb in 1st st; *skp st, mb in nxt st;* repeat across; ch 1 & Turn (22 mb st’s)
Row 5-8:
mb in 1st mb st, and in each mb st across, ch 1 & Turn. At the end of Row 8, drop CC1 & pull up MC at the turning ch. Cut CC1 leaving approx. a 6″ tail to weave in later, or to use as fringe. (22 mb st’s)
Row 9 & 10:
sc in 1st st, and in each st across, ch 1 & Turn. At the end of Row 10, drop MC & pull up CC2 at the ch 1. Cut MC leaving approx. a 6″ tail to weave in later, or to use as fringe.(43 st’s)
Row 11: Surface Slip Stitch Row
Here is a video on how to crochet the surface slip stitch.
www.surface-slip-stitch/youtube
slp st in each st across, in a loose fashion, ch 1 & Turn. At the end of this row, drop CC2 & pull up MC at the ch 1. This sequence of stitches should not be tight as it will pull the placemat out of shape and make it curl. You are now looking at the right side of the placemat. Cut CC2 leaving approx. a 6″ tail to weave in later, or to use as fringe (43 st’s)
Row 12:
By pass Row 11 & execute this next row into Row 10. You can see the top two loops of Row 10 behind the slp st’s of Row 11. Insert your hook under the top two loops. sc in 1st st, and in each st across; ch 1 & turn (43 st’s)
Row 13-26:
sc in 1st st, and in each ch across; ch 2 & Turn; At the end of Row 26, drop MC & pull up CC2 at the ch 1. Cut MC leaving leaving approx. a 6″ tail to weave in later, or to use as fringe.(43 st’s)
Row 27 & 28:
Repeat Row’s 11 & 12 consecutively.
Row 29:
sc in 1st st and in each st across; ch 1 & Turn Drop MC & pull up CC1 Drop MC (43 st’s)
Row 30-34:
Repeat Row’s 4-8 consecutively
Row 35-37:
sc in 1st st, and in each st across. End off.(43 st’s)
If you are not adding fringe, weave in all ends and block. I like to use the steam iron method.
If you are adding fringe no need to weave in ends as you can use them to help with the fringe. I suggest tying them into a knot first. Adding a light fringe is easy, pair 2 or 3 – 8″ strands of varying colors. Tie them into place at the desired area, trim to suit the length you would like. Block when you are finished adding fringe.
Finished Measurements : 14″ w x 10.5″ h


Make sure to visit these links if you are looking for beautiful crochet patterns that will inspire you to make your world a lovely place. If you would like to see more crochet baskets or garments click the links below.
YOUTUBE
RAVELRY
PINTEREST is a fun place and I would love it if you would follow me there.
INSTAGRAM
COPYRIGHT STATEMENT
This pattern is protected by copyright© Krissys Over The Mountain Crochet 2021. Do not sell, alter or redistribute this pattern in any way or form. You have my permission to sell your finished product, but you are responsible for the finished product. No Mass Production.