I will show you how to make a 1920’s Crochet Hat. I have always been captivated with the romantic hat’s that came from the 1920’s. The fashion trend for women was a boyish boxy style, but there was also a thread of femininity in many of the designs and it was ever present in the hat’s of that era. It was a remarkable time in history. Making this 1920’s Black Dahlia Cloche was a journey into happiness.

This post may contain affiliate links when clicked on I may receive a small commission at no cost to you. Thank you for supporting my small business!
I made this design and published the crochet pattern in 2012. The pattern was in need of some attention as my pattern writing style has changed. So I polished it up and you will find an all sizes included, free version here, or click “Free Patterns” in the menu bar to view all of my free patterns. The DIY embellishments are easy and I will show you how to add them to your 1920’s Cloche.
You can purchase an ad free crochet pattern that includes this embellishment tutorial or add it to your que on Ravelry and Etsy, for less than a cup of coffee.
Sequin Band and Flower Tutorial
Supply List:
Purchased Black Dahlia, or flower of choice. I purchase most of my flowers at Michaels.
3 ½” – 4” wide Black Lace, approx. 13”-15” long
Vintage or Retro earring or brooch of choice
1 ½” wide Elasticized Sequin trim, length determined by circumference of hat
Strait pins
Sewing Needle and Matching thread
Scissors
Hot glue gun and glue sticks.
You are welcome to use a hot glue gun in place of hand sewing, but I prefer hand sewing. This will give you an heirloom quality piece of art.
Items in the Photo Tutorial are different than the product used to make the Black Dahlia Cloche, but they represent the exact same process used.

Most large silk flowers come on a stem. Pull or cut the flower head off of the stem. (You may need wire cutters if cutting it off the stem) Cut off any protrusions that may have been left behind. Some flowers may fall apart at this point. Don’t let go of that flower head and handle it gently until you have been able to secure the flower. Hold the flower like you would an apple that you are going to take a big bite out of.

Once you take the flower off the stem, trim the extra pieces. The flower may look sturdy and secure but it could easily fall apart. Hang on, I will show you how to fix this.

Continue to hold the flower like you are going to bite that apple, and start peeling back the layers. The layers will need to be glued together. Don’t be deceived if you start seeing glue, because all layers are not glued and until you secure the flower it could all pop apart, and that would be a disaster.

Add a little glue to all of the layers going from one side to the other in an east to west fashion. Too much glue can hinder you from being able to sew the flower on the hat. Get that glue deep down in there. Please use caution when handling a hot glue gun.

When the flower is secure, look to see if it has a small tight center, you can pull it out by twisting and pulling, while holding the flower securely. It’s time to do a test run and put your vintage piece in the center. Check to see if there are extra petals that will cover your vintage piece. Remove any offending petals.

Load the center with hot glue, but don’t add too much glue. You don’t want to glue to push up through the jewelry piece.

If you have a valuable piece of vintage jewelry, you can sew or wire it in place. I recommend button thread to do this. You could always use a combination of thread and mono filament thread together to sew it on. This will make it a very sturdy connection.

Next step is preparing the lace. Hold the right side toward you and roll the right edge under and pin it in place.

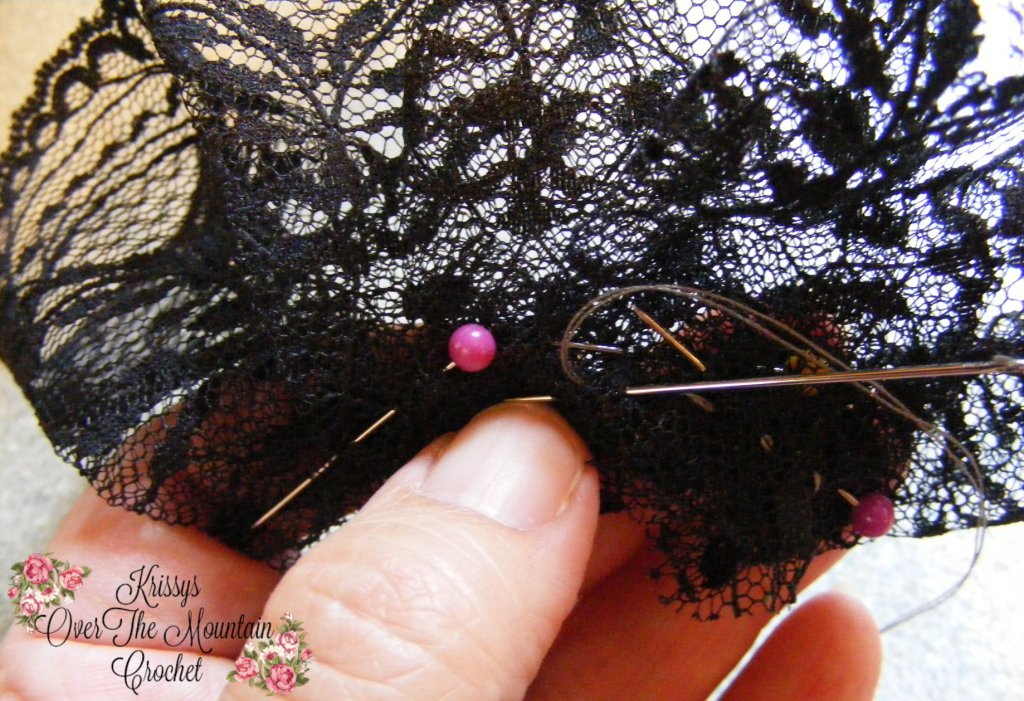
Start hand pleating the lace and pinning it in place.

Continue to pleat until you have 2 or 3 inches left.

Roll that last 2-3 inches under and pin in place.

It should be in the shape of a fan.

Time for another test runnto see how the lace looks when you place it behind the flower. Would you like it to be on the side framing a 1/3 of the flower? If so, then the lace needs to be bunched up a little.

Maybe you want it to fan out around the top half of the flower? Then the lace fan will need to be spread out. Bunched up or spread out is an important decision to make before the next step.

Remembering the position you chose, bunched up or spread out, it is to sew the pleated lace fan. Hand sewing is simple and will hold the lace fan together for easy sewing on the back of the flower. Hand sewing tip: take two stitches forward, and one stitch back to secure your stitches, and lock them in place.

Now that the lace fan is stable, sew it to back of flower. You may need to use a thimble to help push through as some of the layers can be a little tough.

Woo Hoo! You are almost finished! Next step is to pin the elasticized sequin trim, at the top of the sc brim of the Black Dahlia Cloche. Remember this trim is stretchy.

Continue to pin sequined elastic around the circumference of the hat. Not stretching the trim, just laying it evenly and pinning around.

When you arrive back to the beginning, cut the trim so that it has a bit of overlap and is long enough to fold under.

Fold the end under. It will cover the raw edge of trim at the starting point. Pin the folded edge in place.

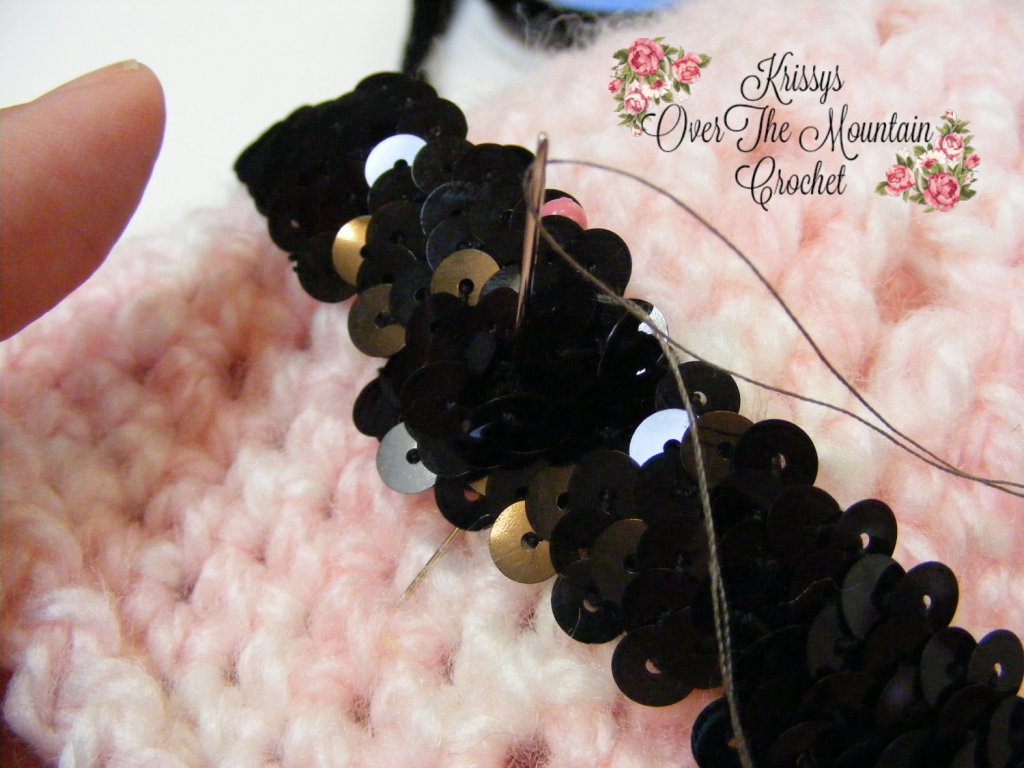
Sewing the sequin trim to the hat is so much easier than it looks! Start sewing from underneath going in and out of the trim, catching the elasticized part. Be careful that you don’t disturb the direction that the sequins are positioned.

The best place to start the sewing is the folded area of the sequin trim. Make sure this folded area is sewn down in a secure manner. Don’t worry if it looks a little messy as this is the spot where the flower will be attached. Sewing the sequin trim is easy to do and you can do this!

Proceed to sew around the circumference of the hat sewing the sequin trim in place. It is so easy. It is east to catch that elastic, and weave in and out among the sequins. The thread will hide under the sequins.

Of course when you are back at the beginning finish it off with a knot. YAY! You are finished with the sequin band! Now it’s time to sew on the flower. Pin the flower on the hat, placing it over the folded area.

Start sewing from behind, catching the petals of the flower. I recommend using a thimble. If you hit a really tough spot a pair of needle nose pliers can either push or pull that needle through.

You are finished!
I hope you enjoy your creation!
The photo below is perfect for pinning to your favorite crochet boards, so that you never lose this tutorial.

If you would like to stay up to date on what is happening on my side of the mountain, please visit and join my FB group Krissy’s Over The Mountain Crochet and Crafts
I do have an ETSY shop right here!
You can find my other designs at my RAVELRY Shop
I would love it if you would follow me on Pinterest.
This pattern is protected by copyright Krissys Over The Mountain Crochet©2019. Do not sell, alter or redistribute this pattern in any way or form. You have my permission to sell your finished product, but you are responsible for the finished product. You may NOT use my photos to sell your product or promote your website.
Waiting for the train reminds me of train trips I’ve taken. I’d love to take one across country to visit our kids. I’m now a paraplegic so that won’t be happening. I’ve not found accessible trains yet. Grrr. That doesn’t mean I wouldn’t love making the snazzy hat you designed. Kick up your heels while you can.