

This Pumpkin Stitch Water Bottle Holder Free Crochet Pattern is a fun way to carry your favorite water bottle while adding a little handmade fall style to your day. I love the way the pumpkin stitch circles the top of the water bottle holder. The Free Crochet Pattern is below and if you prefer an ad free pdf you can pick it up at ETSY or RAVELRY.


Whether you’re heading out for a walk, going to church, attending a craft show, running errands, or simply want to keep your water bottle close by, this crochet water bottle holder is designed to make carrying your bottle easy and comfortable.

And yes, you can even add a sweet little bow just like the one added to the Original Water Bottle Holder that I designed.


I Think You’ll Love This Crochet Water Bottle Holder
The handle measures approximately 34.5 inches, but you can easily make it longer. If you prefer to wear your water bottle across your body, simply increase the handle length to approximately 54 inches for a comfortable crossbody carry. Are you getting my emails?
The Sturdy Ribbed Bottom
The bottom of this crochet water bottle holder used the High Back Post Half Double Crochet Stitch and features a sturdy ribbed design that gives the base extra structure.
The ribbed construction also adds a nice bit of texture to the finished carrier.
Having added texture is nice too.
Ravelry Code: PUMPKIN STITCH

The Handle Can Be Worn Two Ways
The standard handle measures approximately 34.5 inches, making it easy to carry over your shoulder.
If you would rather have a crossbody water bottle carrier, simply increase the length of the handle to approximately 54 inches.
This makes the pattern easy to customize for the way you like to carry your bottle.
You can make the handle shorter or longer depending on your height, how you plan to wear it, and the type of bottle you are using.
Crochet Pumpkin Stitch Video Tutorial
If you are new to the pumpkin stitch, don’t worry!
I have created a video tutorial showing you how this unique stitch is made.
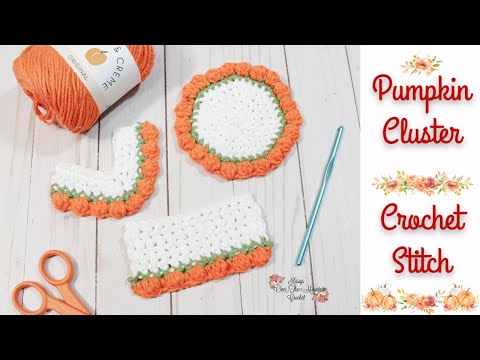
I always recommend watching the video before beginning if you are a visual learner. Seeing the stitch worked can make the written instructions much easier to understand.
The Pumpkin Stitch Water Bottle Holder crochet pattern is available free here on my blog.
If you prefer to have a convenient ad-free PDF crochet pattern, you can purchase the printable version at ETSY or RAVELRY.
Crochet Pattern Details
Skill Level
This pattern uses basic crochet stitches along with the special pumpkin stitch design.
If you are comfortable following written crochet instructions you should be able to make this water bottle holder.
Pattern Information
Supplies You’ll Need
For this pumpkin stitch water bottle holder, you will need:
- (4) Worsted Weight yarn
- Crochet hook
- Yarn needle
- Scissors
- Measuring tape
- Optional ribbon for the bow
Designer Notes:
1. This crochet pattern is written in US terms.
2. Portions of this design are worked in the round.
3. Place a marker at the beg. of each round, when you start crocheting in the round.
4. All beginning chains do not count as a stitch
5. The specialty pumpkin stitch video tutorial can be found here. Start watching at the 2:20 minute mark Pumpkin Cluster Crochet Stitch
Water Bottle: I used a Hydraflow 25oz bottle
https://hydraflowbottle.com/products/25-oz-hybrid-flipstraw-1
You could also use the Owala Stainless steel 24 oz water bottle
https://www.walmart.com/ip/Owala-FreeSip-Stainless-Steel-Water-Bottle-24oz-Black/785624932
Optional Supplies:
1. Any ribbon you would like to use so that you can add bows to the side of the tumbler.
a. If you are using wired ribbon I recommend removing the wire.
b. If you want to keep the wire, pull a ½” out of it out, then clip that wire end off. Then let the wire retract into ribbon casing.
Photo Tutorial to make a boutique Tuxedo bow.
https://krissysoverthemountaincrochet.com/2024/05/making-a-boutique-bow-for-a-baby-sailor-hat/
Tutorial on how to make a pull tie bow.
Video tutorial
How To Make Pull Tie Hair Bow With 5/8″ Dollar Tree Ribbon
Photo tutorial on how to make a Pull Tie Bow.
https://krissysoverthemountaincrochet.com/2018/09/it-takes-a-pinch-to-make-a-perfect-pull-tie-bow/
2. “Fray Check” to seal the ribbon ends. (some wired ribbons are made with fabric & can’t handle heat sealing)
https://www.walmart.com/ip/Dritz-88081-Fray-Check-with-Fabric-Guide-Applicator-Tip/27683522
- Matches, wood burning tool or a lighter to seal the ends of grosgrain & satin ribbon.
4. Pre Made Appliques. 3” to 4”. Etsy has a great selection.
5. Sewing Needle and thread to sew on ribbons, bows or appliques, if you choose not to use glue.
6. Hot Glue or any glue of your choice to glue appliques or ribbon bows in place. You are welcome to use fabric glues, but they don’t hold up in a wash. There are so many glue options out there.
7. Embroidery Sewing Machine and the stabilizers needed to monogram on the Tumbler Wrap. I will have a tutorial on this at a later date
Pull Tie Bow Tutorial: How To Put Fat Bows On A 40 oz Tumbler Crochet Wrap
Gauge: 4”h x 4”w = 18 sc rows high x 13 sc st’s wide.
Stitch Guide:
MC = Main Color
CC2 = Pumpkin Color
CC3 = Green Leaf Color
ch= Chain
ch3= chain 3
sc = Single Crochet
slp st = Slip Stitch
fp hdc = Front Post Half Double Crochet
bp hdc = Back Post Half Double Crochet
hbp hdc = High Back Post Half Double Crochet – video tutorial High Back Post Half Double Crochet Stitch Easy Tutorial
st/st’s = stitch or stitches
Special Stitch
PC – Pumpkin Cluster = *yo, insert hook into stitch indicated, pull up a loop, pull thru 2 loops* 3x; yo, pull thru all 4 loops on the hook, ch1 to close the st. push the cluster to the front of your work.
Terminology Abbreviations:
beg. = beginning
nxt = Next
x = Times; example execute sequence 2 x or 2 times; 3 x or 3 times and so on;
* * = Execute sequence between the stars the number of times stated;
in = example “in nxt st” means you will be inserting the hook under the top two loops of the next stitch to complete the stitch or sequence of stitches stated.
ch3 & join in a ring or use the magic circle
Round 1:
ch1 hdc in ring 10x; join w/slp st to beg. hdc (10 hdc)
Round 2:
ch1, 2 hdc in joining st; *2 hdc in nxt st;* 9x; join w/slp st to beg. hdc (20 hdc)
Round 3:
ch1, hdc in joining st, 2hdc in nxt st; *hdc in nxt st, 2hdc in nxt st;* 9x; join w/slp st to beg. hdc (30 hdc)
Round 4:
ch1, hdc in joining st & nxt st, 2hdc in nxt st; *hdc in nxt 2st’s, 2hdc in nxt st;* 9x; join w/slp st to beg. hdc (40 hdc)
Measurement – 3.75” across
Round 5: hbp hdc = High Back Post Half Double Crochet = High Back Post Half Double Crochet (insert hook from back to front around to the back again, HIGH above the post, above the 3rd loop) link to video tutorial is found in the stitch key.
ch1, hbp hdc in joining st; * hbp hdc in nxt st and each remaining st around; join w/slp st to beg. hbp hdc (40 hbp hdc)
Round 6: (Note: ch2 will recede and become a mock bp hdc); fp hdc around 1st hdc; *bp hdc around nxt hdc, fp hdc around nxt hdc;* complete sequence between * * around; join w/slp st in 2nd ch of beg. ch2 (40 st’s)
Round 7&8: Repeat Round 6
Round 9: ch1, sc in joining st and in each st around; do not join
Round 10-31: sc in nxt st; place a marker in this 1st st; *sc in nxt st* 39x or until you reach the marker. Repeat the round, remembering to move the marker (I leave the original marker on round 10. Use a second marker at round 11, and move that marker for all of the other rounds.
At the end of Round 31, drop MC, slp st in next st, pulling up CC1. This will be the beg of the next round
Round 32: ch1, sc in joining st, PC in nxt st; *sc in nxt st, PC in nxt st;* 18x; join w/slp sp to beg. sc, dropping and ending off CC1 and pulling up CC2 at the join ;
(19 PC & 20 sc)
Round 34: ch1, sc, ch1, sc in joining st; *skp PC; sc, ch1, sc in nxt sc st;*19x; skp last PC, join w/slp st to beg. sc, dropping and ending off, CC2 and pulling up MC at the join.
Round 35-37:ch1, sc in each sc around, skipping all ch1’s; join w/slp st to beg. sc
Measurement – rounds 6-37 = 7.25”
Handle
Chain 120, (190 if you would like for it to be cross body)being careful not to twist the chain, slp st to the opposite side (fold the carrier in half and place a marker directly across from the beg. of the chain if you wish)
While at the opposite side, slp st in the next st, that is left of the join; ch2; dc in each chain;
When you arrive at the opposite side, skp 1 stitch; slp st or join in the nxt st;
ch1 & turn; sc in each dc back across.
When arriving at the opposite side, skp one stitch and slp st in the next. End off and weave in all ends.
Handle Measurement – 34.5” (54” cross body)
You can change the color of the water bottle holder to coordinate with your favorite season, team, outfit, or event. The pumpkin stitch would look especially pretty in traditional fall colors, but don’t be afraid to think outside the box.
You can also change the handle length to make it more comfortable for the person who will be carrying it.
And don’t forget that little bow! It is an easy way to give your finished water bottle carrier a completely different personality.
More Crochet Patterns You May Enjoy
If you enjoyed making this Pumpkin Stitch Water Bottle Holder, you may also enjoy some of my other pumpkin crochet designs.


Pin This Pumpkin Crochet Pattern for Later
Save this Pumpkin Stitch Water Bottle Holder Free Crochet Pattern to your favorite crochet board so you can easily find it when you’re ready to start your next fall crochet project.


Stay Connected With Krissy’s Over The Mountain Crochet and Crafts
I love sharing crochet patterns that aren’t just pretty, but are useful too.
If you enjoy practical crochet projects, seasonal patterns, crochet tutorials, and handmade ideas, I would love for you to follow along.
- YouTube: https://www.youtube.com/@krissysoverthemountaincrochet
- Ravelry: https://www.ravelry.com/designers/kris-moore
- Pinterest: https://www.pinterest.com/KrissysOverTheMountainCrochet/
- Etsy: https://www.etsy.com/shop/KrissysOTMCrochet
- Instagram: https://www.instagram.com/krissysoverthemountaincrochet/
It was so good to have you on my side of the mountain. I hope you enjoy making this pumpkin stitch water bottle holder as much as I enjoyed designing it!
Take care and God Bless,
Krissy
COPYRIGHT STATEMENT: This crochet pattern is protected by copyright © Krissy’s Over The Mountain Crochet and Crafts 2026. Do not sell, alter, reproduce, or redistribute this tutorial or its photographs in any way or form. You may sell finished items made from this pattern. The maker is responsible for the finished product.
SAFETY NOTE: This pattern is intended for personal crafting use. Always use appropriate care when carrying liquids, and keep crochet items away from flames and excessive heat. Full guidelines are available here: Safety & Care Guidelines